Step-by-Step: How to Make a Candle Wick at Home

candle wicks

Candle making is a delightful and rewarding hobby that allows you to express your creativity and fill your home with beautiful scents. One of the most crucial components of candle making is the wick. In this article, we will guide you through the process of making your own candle wick at home. From understanding the basics to the step-by-step process, let’s illuminate your crafting journey.

Understanding the Basics of Candle Wicks

Before diving into the process of making your own candle wicks, it’s essential to understand what a candle wick is and its significance in the art of candle making.

What is a Candle Wick?

A candle wick is the component of a candle that allows it to burn. It is typically made from braided cotton, wood, or other materials that can be lit and sustained by the wax and fuel. When lit, the wick draws the melted wax up to fuel the flame, creating light and fragrance. The wick’s design and material play a crucial role in how efficiently the candle burns, affecting everything from the size of the flame to the amount of soot produced. A well-designed wick can enhance the overall candle experience, making it not just a source of light, but also a source of ambiance and comfort.

Importance of a Good Quality Wick

The quality of a candle wick can significantly affect the performance of your candle. A good wick ensures a steady burn, prevents excessive soot, and contributes to an even distribution of fragrance. Using the right wick for your specific candle size and wax type is crucial for achieving optimal results. Poor-quality wicks can lead to a variety of issues, such as tunneling, where the candle burns down the center, leaving wax around the edges. This not only wastes wax but can also create a frustrating experience for the candle user. Therefore, investing in high-quality wicks is essential for both aesthetic and functional purposes.

Different Types of Candle Wicks

There are several types of candle wicks available, each suited to different kinds of wax and candle designs. Here are some common types:

  • Cotton Wicks: These are the most popular due to their ability to burn cleanly and evenly.
  • Wooden Wicks: These provide a unique crackling sound reminiscent of a fireplace and have a distinctive aesthetic.
  • Hemp Wicks: Made from hemp fibers, these wicks offer a natural alternative.
  • Core Wicks: These wicks contain a metal or paper core for added stability, making them ideal for larger candles.

In addition to these common types, there are also specialty wicks designed for specific applications. For example, some wicks are treated with additives to enhance their burning properties, while others are designed to work with particular wax blends like soy or paraffin. Understanding the nuances of each wick type can empower candle makers to tailor their creations to achieve the desired burn characteristics and visual effects. Moreover, experimenting with different wick sizes and materials can lead to delightful surprises in the candle-making process, allowing for a more personalized touch in each handmade candle.

Gathering Your Materials

Once you understand the basics of candle wicks, the next step is to gather all the materials you will need to create your own. This will ensure a smooth and successful wick-making process. Having everything prepared in advance not only saves time but also enhances your creativity as you can focus on the crafting rather than scrambling for supplies.

Essential Tools for Making a Candle Wick

To make your own candle wick, you will need specific tools that will help you create and treat your wick. Here’s a list of essential tools:

  • Scissors
  • Double boiler or microwave-safe container
  • Measuring spoons
  • Thermometer
  • Container to hold your wick

Each of these tools plays a crucial role in the wick-making process. For instance, using a double boiler ensures that the wax melts evenly without burning, which is vital for maintaining the integrity of the wick. A thermometer is equally important, as it helps you monitor the wax temperature, ensuring it reaches the ideal melting point for optimal wick absorption. Additionally, having a dedicated container for your wick can help you keep everything organized, making it easier to manage multiple wicks if you decide to create several candles at once.
candle wicks

Choosing the Right Materials

The materials you choose for your candle wick will impact the burn quality and overall effectiveness. Here are the main materials required:

  • Candle wax (like paraffin, soy, or beeswax)
  • Cotton or hemp fibers for the wick
  • Additives like wick sustainer or fragrance (optional)

When selecting your candle wax, consider the type of ambiance you wish to create. For example, soy wax is a popular choice for those looking for an eco-friendly option that burns cleanly and evenly. Beeswax, on the other hand, offers a natural honey scent and is known for its longer burn time. The choice of wick material is equally significant; cotton wicks provide a steady burn, while hemp wicks can add a rustic touch to your candles. Additionally, if you choose to incorporate fragrances or dyes, ensure they are compatible with your wax type to achieve the best results in both scent throw and color vibrancy.

Preparing Your Workspace

A cluttered and disorganized workspace can lead to accidents and mistakes when making your candle wicks. Having a well-prepared space will enhance your crafting experience. A clean and organized area not only boosts your creativity but also allows you to focus on the intricate details of your candle-making process without distractions.

Safety Measures to Consider

Safety is paramount in any crafting process, especially when dealing with hot wax. Here are some safety measures to consider:

  • Wear safety goggles and gloves to protect your eyes and hands.
  • Ensure your workspace is well-ventilated to avoid inhaling fumes.
  • Keep a fire extinguisher close by in case of emergencies.

Setting Up Your Workspace

To set up your workspace effectively, designate an area that is away from flammable materials. Prepare all your tools and materials in advance, so you can work efficiently. Lay down newspaper or a drop cloth to protect surfaces from spills and drips. Additionally, consider organizing your tools in a way that makes them easily accessible; using small bins or trays can help keep everything in its place. Labeling containers can also save you time when searching for specific items, ensuring that your creative flow remains uninterrupted.

Furthermore, think about the lighting in your workspace. Adequate lighting is crucial for detailed tasks such as cutting wicks or measuring wax. Natural light is ideal, but if that’s not an option, invest in bright, adjustable task lamps that can illuminate your work area without causing glare. A well-lit environment not only enhances your ability to see what you are doing but also contributes to a more enjoyable and productive crafting session.

The Process of Making a Candle Wick

Now that you have your materials and workspace ready, it’s time to learn the actual process of making a candle wick.

Preparing Your Wick Material

Start by cutting your wick material into the desired length, which should be generally 2-3 inches longer than your candle container’s height. If you are using cotton or hemp fibers, you may want to unbraid or separate them to create a thicker, stiffer wick, depending on your candle’s requirements. Additionally, consider the type of wax you will be using; softer waxes may require a thicker wick to ensure a steady burn, while harder waxes can work well with a finer wick. Experimenting with different materials can lead to discovering unique textures and burn qualities that enhance your candle-making experience.

Treating Your Wick

A key step in making a quality wick is treating it with wax. This process helps the wick maintain its shape and ensures it burns effectively. To treat your wick:

  1. Heat your chosen wax in a double boiler until it reaches a temperature suitable for dipping.
  2. Immerse the wick into the molten wax, ensuring it is fully coated.
  3. Allow the wick to soak for a few minutes, then remove it and set it on a flat surface to cool and harden.

During this treatment, you might also consider adding essential oils or fragrance oils to the wax, which can infuse your wick with a subtle scent that enhances the overall aroma of your candle. This not only adds a delightful olfactory element but can also create a more cohesive scent profile when the candle is lit. Just be cautious about the amount you add, as too much fragrance can affect the wick’s burning properties.
candle wicks

Drying and Cutting Your Wick

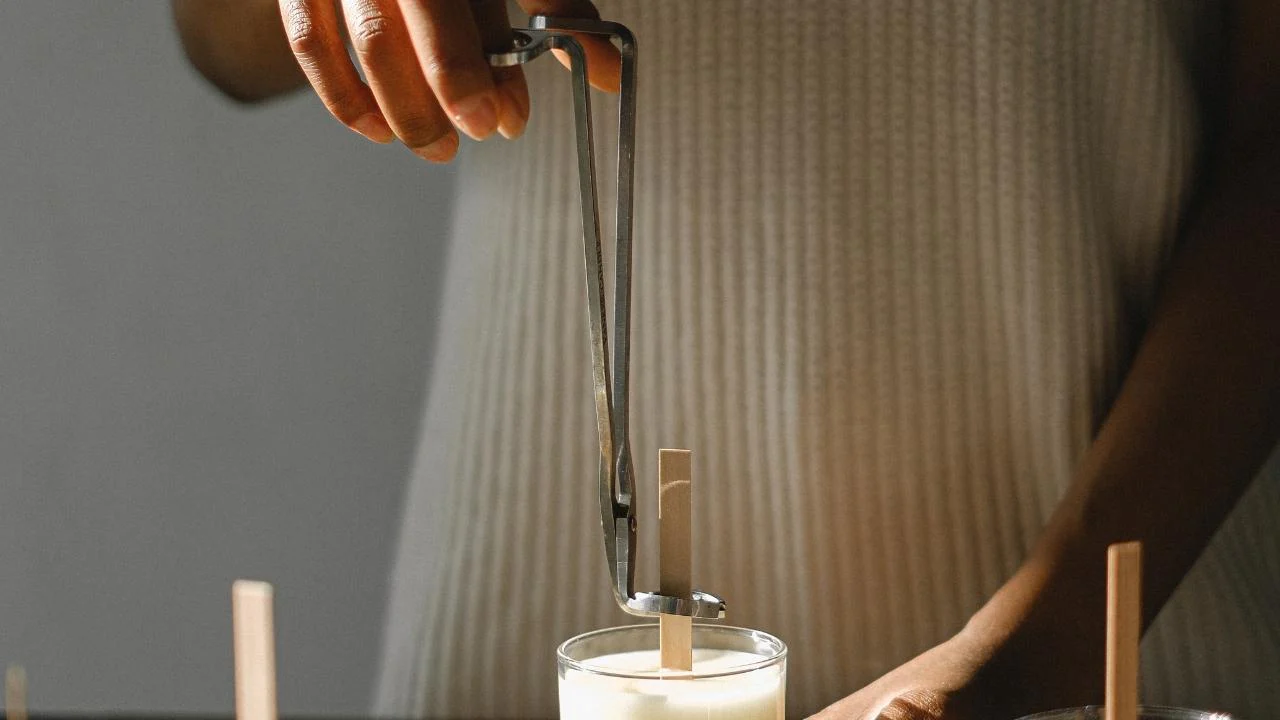
After the wax has fully cooled and solidified, you can cut the wick to your desired size, again making sure it is a couple of inches taller than your container. This will give you some extra length that will be adjusted later for the perfect burn. As you cut, consider the wick’s final placement in relation to the candle’s surface; a wick that is too short may lead to tunneling, while one that is too long can create excessive soot and an uneven burn. It’s also a good idea to trim the wick to about 1/4 inch above the wax surface before lighting your candle for the first time, as this helps to ensure a clean and steady flame, maximizing both the burn time and the fragrance throw of your candle.

Tips for a Successful Candle Wick Making

Making your own candle wick is a straightforward and satisfying process, but there are a few tips to keep in mind to ensure your success.

Common Mistakes to Avoid

As with any crafting activity, mistakes can happen. Here are some common pitfalls and how to avoid them:

  • Using the wrong wick size for your candle — always match your wick size to the candle size.
  • Forgetting to treat your wick with melted wax before using it.
  • Not testing the wick before you start making your candles — perform a burn test for best results.

How to Test Your Homemade Wick

After making your candle wick, it is essential to test it to ensure it burns correctly. Here’s how:

  1. Place the wick in a small amount of wax and allow it to harden.
  2. Light the wick and observe the burn. Check for evenness, soot levels, and scent throw.
  3. Adjust the wick thickness or material as needed based on your observations.

Through careful preparation and attention to detail, you can make effective and beautiful candle wicks at home. With practice, you will master the art of wick-making, ultimately leading to stunning homemade candles that brighten your space and uplift your senses. Happy crafting!

See Also : Create Your Own Scents with a Scented Candle Making Kit in Australia
Create Your Own Scents with a Scented Candle Making Kit in Australia
candle wick wood

Candle making is a rewarding and creative hobby that allows you to infuse your space with delightful fragrances while expressing your artistic side. With the right scented candle making kit, you can start crafting beautiful and aromatic candles right in the comfort of your home in Australia. This article will guide you through the fundamentals of scented candle making, the different types of scents you can explore, and provide a step-by-step guide to creating your own custom candles.

Understanding the Basics of Scented Candle Making

Candle making combines art and science, making it a multifaceted craft that’s both enjoyable and educational. At its core, the basic process involves melting wax, adding fragrance, and pouring it into a mold or container. However, several factors can influence the final product.

The Art and Science of Candle Making

Here’s the revised text with the keyword “candle wick wood” integrated smoothly:


The art of candle making lies in the creativity of blending scents, choosing colors, and forming the shape of the candle. Science comes into play when you consider the chemical properties of wax, fragrance oils, and wicks. Using a candle wick wood option can add a unique element to your candles, providing a soothing crackling sound and a distinctive flame. Understanding the interaction between these elements can elevate your candle-making process.

Candle making involves trial and error, so don’t be afraid to test different combinations to discover what works best for your personal preferences. For instance, experimenting with layering different scents can create unique olfactory experiences, while using candle wick wood can alter the burn time, enhance the fragrance throw, and add a rustic, natural feel to your candles. This exploration not only enhances your skills but also allows you to create candles that are truly one-of-a-kind.

Essential Tools in a Candle Making Kit

A good quality scented candle making kit should include various essential tools. Here’s a brief rundown of the items you’ll commonly find in a kit:

  • Wax (soy, paraffin, or beeswax)
  • Fragrance oils
  • Wicks
  • Molds or containers
  • Thermometer
  • Double boiler or melting pot
  • Stirring sticks
  • Color dyes (if desired)

Having these tools at your disposal will help streamline your candle-making process and enhance your experience. Investing in a comprehensive kit will ensure that you have everything you need to begin your candle-making journey. Additionally, consider including safety gear such as gloves and goggles, especially when working with hot wax and dyes. This will not only protect you but also create a more enjoyable crafting environment.

Importance of Quality Ingredients in Candle Making

The quality of ingredients significantly affects the final outcome of your candles. When choosing wax, look for natural and eco-friendly options like soy or beeswax. These materials not only burn cleaner but also hold scents better than synthetic alternatives.

Fragrance oils are another crucial component. Opt for high-quality oils that are specifically formulated for candle making to ensure an enjoyable scent throw and longevity. Low-quality fragrances can lead to disappointing results, so it pays to do your research before purchasing. Moreover, consider the source of your ingredients; supporting local suppliers can not only ensure freshness but also contribute to sustainable practices within your community. The right combination of quality ingredients will not only enhance the aesthetic appeal of your candles but also create a more satisfying sensory experience for those who enjoy them.

Exploring Different Types of Scents

Once you’re familiar with the basics of candle making, it’s time to explore the world of scents. Different fragrances can evoke various moods, set the tone for your environment, and even impact your emotions. The art of scent selection is not just about personal preference; it’s about creating an atmosphere that resonates with your experiences and aspirations.

Popular Scents and Their Effects

Choosing the right scent can transform your space. Here’s a list of popular candle fragrances and the feelings they tend to evoke:

  • Lavender: Calming and relaxing, often used for stress relief.
  • Vanilla: Warm and inviting; perfect for creating a cozy atmosphere.
  • Citrus: Uplifting and energizing, great for a refreshing vibe.
  • Cinnamon: Comforting and spicy; ideal for fall and winter.
  • Pine: Earthy and grounding, reminiscent of the great outdoors.

Understanding these effects can help you choose scents that resonate with your desired ambiance. For instance, if you’re hosting a dinner party, a blend of vanilla and cinnamon can create a warm and inviting environment, while citrus scents can invigorate your guests and keep the energy lively. Additionally, floral scents like jasmine or rose can add a romantic touch, making them ideal for special occasions.

Mixing and Matching Scents

This is where your creativity shines! Mixing scents can create unique fragrance profiles tailored to your personal taste. However, it’s essential to consider how different scents will complement each other. Start by experimenting with two or three complementary fragrances, seeking an equal balance that enhances each note. For example, combining lavender with a hint of eucalyptus can produce a refreshing yet soothing aroma, perfect for a spa-like atmosphere.

Keep a journal of your experiments to document which combinations work well and which ones you might want to avoid in the future. You might discover that certain scents, when blended, can evoke memories or feelings that are particularly meaningful to you. This exploration can turn into a delightful journey of self-discovery, as you learn how different fragrances resonate with your personal experiences.

Understanding Scent Strength and Throw

Two terms to become familiar with are “scent strength” and “scent throw.” Scent strength refers to how potent the fragrance is, while scent throw indicates how far the scent travels in the room once the candle is lit. Some scents tend to have a stronger throw, making them ideal for larger spaces. For instance, a strong sandalwood scent can fill a room with its rich aroma, while lighter scents like green tea may be better suited for smaller, more intimate settings.

When formulating your candle, aim for a balance between scent strength and throw, so the fragrance is noticeable without being overpowering. Additionally, consider the type of wax you are using, as different waxes can affect how well the scent is released. Soy wax, for example, is known for its excellent scent throw, making it a popular choice among candle makers. Experimenting with different wax types can open up new possibilities for your scent creations, allowing you to tailor your candles to perfectly fit the mood you want to create.

candle wick wood

Step-by-Step Guide to Making Your Own Scented Candles

Now that you understand the fundamentals and have selected your scents, let’s dive into the step-by-step process of making your own scented candles.

Preparing Your Workspace

Before you start, ensure that you have a clean and organized workspace. Lay down newspaper or protective plastic to catch any spills. Gather all the materials and tools you need to avoid running around during the process.

It’s also wise to wear an apron to protect your clothing and have safety gear like gloves and goggles on hand if you’re using hot wax or dyes. Additionally, consider having a small bowl of cold water nearby to quickly cool any spills or drips that may occur while pouring the wax. This can help prevent any accidents and keep your workspace tidy. Proper ventilation is also important; if you’re working in a small area, open a window or use a fan to ensure that any fumes from the wax or fragrance oils dissipate quickly.

Melting the Wax and Adding the Scent

Begin by measuring out the appropriate amount of wax according to the size of your container. Melt the wax using a double boiler, monitoring the temperature with a thermometer until it reaches around 70-80°C. Add the fragrance oil at this stage, ensuring it blends well by stirring thoroughly.

Different waxes have specific temperature guidelines for adding scents, so follow the instructions for your chosen wax type closely to optimize scent throw. It’s also a good idea to experiment with different fragrance combinations to create a unique scent profile. For example, blending floral notes with a hint of citrus can produce a refreshing aroma that’s perfect for spring. Keep in mind that the quality of your fragrance oils can significantly impact the final scent, so invest in high-quality oils for the best results.

Pouring and Setting Your Candle

Once your wax and fragrance are well combined, it’s time to pour. Carefully pour the mixture into your prepared molds or containers, leaving some space at the top. Allow the candle to cool undisturbed until it solidifies. This may take several hours, depending on the size of the candle.

Once fully set, trim the wick to about half an inch above the surface for optimal burning. Your scented candle is now ready to be enjoyed or gifted! To enhance the presentation, consider decorating the container with labels or ribbons that reflect the scent or occasion. You can also experiment with adding decorative elements like dried flowers or herbs to the top of the candle before it sets, creating a beautiful and aromatic visual appeal. This personal touch not only makes your candles more attractive but also adds an extra layer of charm to your homemade creations. Click the link : https://52weeksofgeek.com/step-by-step-how-to-make-a-candle-wick-at-home/ to get step by step guidence to make candle wick at home.

Safety Tips for Candle Making

While candle making is an enjoyable activity, it’s essential to prioritize safety during the process. By following a few simple tips, you can ensure a safe and successful experience.

Handling Hot Materials

Always exercise caution when working with hot wax and equipment. Use heat-resistant gloves when handling hot containers and make sure to keep a close watch while melting the wax to prevent accidental burns.

Never leave the melting wax unattended, and be prepared to extinguish any minor mishaps with a fire extinguisher or a suitable fire blanket. Additionally, consider using a thermometer to monitor the temperature of the wax, as overheating can lead to dangerous situations, such as spontaneous combustion. Ensure that your workspace is free from clutter to minimize the risk of accidents, and always have a first aid kit on hand in case of any unexpected incidents.

Ensuring Proper Ventilation

When working with fragrances and hot wax, it’s important to have good ventilation. Open windows or work in a well-ventilated area to reduce fumes and ensure a pleasant working environment. This is particularly crucial if you’re using any dyes or additional additives.

In addition to opening windows, consider using a fan to help circulate air and disperse any potentially harmful vapors. Some fragrance oils can release strong scents that may be overwhelming in enclosed spaces, so it’s wise to test a small amount before committing to a larger batch. Always be aware of any allergies or sensitivities you or your fellow crafters may have to certain ingredients, and opt for natural or hypoallergenic alternatives whenever possible.

candle wick wood

Safe Storage of Materials

Store your candle-making supplies in a cool, dry place, out of reach of children and pets. Adhere to the manufacturer’s guidelines for storing wax and fragrance oils to maintain their quality and safety.

Organizing your materials in labeled containers can also help prevent mix-ups and ensure that everything is easy to find when you’re ready to create. Be mindful of expiration dates on fragrance oils and dyes, as using expired materials can affect the quality and safety of your candles. Additionally, keep a detailed inventory of your supplies to avoid overstocking hazardous materials, and regularly check for any signs of damage or degradation in your tools and ingredients.

By following these safety tips, you can enjoy the creative process of candle making while minimizing risk.

In conclusion, creating your own scents with a scented candle making kit in Australia is an enriching experience that combines creativity, relaxation, and skill. The ability to craft unique fragrance profiles tailored to your preferences not only beautifies your space but also nurtures your well-being. So gather your tools, explore different scents, and embark on your scented candle-making adventure today!

Choosing the Right Candle Wick: A Comprehensive Guide for Perfectly Burning Candles

Candle Wick

Candle making is an art, and one of the most crucial components in crafting the perfect candle is selecting the right wick. The wick affects how evenly your candle burns, how long it lasts, and even how strong the fragrance is. Whether you’re a beginner or an experienced candle maker, understanding the importance of choosing the right wick can dramatically enhance your candle’s quality. This guide will cover everything you need to know about choosing the right candle wick to create perfectly burning candles.

Why Choosing the Right Wick Matters

The wick acts as the candle’s engine, drawing wax into the flame to keep it burning. Selecting the wrong wick size or material can lead to a range of issues such as poor burn performance, uneven melting, or excessive smoke. Understanding the different types of wicks and their uses will ensure you get the best results. Click here to get about top 10 candle making supplies you need to start crafting beautiful candles.

Types of Candle Wicks

There are several types of candle wicks available, each suited to different kinds of wax, containers, and candles. Here’s an overview of the most common wick types:

Cotton Wicks:

Cotton wicks are the most commonly used and are versatile for a variety of candle types. These wicks work well with soy, paraffin, and beeswax candles. Cotton wicks are known for producing a steady, clean flame with minimal smoke.

Wood Candle Wicks:

A rising trend in candle making, Wood candle wicks create a beautiful crackling sound as they burn, similar to a fireplace. They work best with soy wax and other natural waxes. Wood wicks are perfect for creating an ambiance, but they require careful trimming to avoid overburning or mushrooming. You’ll want to ensure you get the right thickness and length for your container size.

Hemp Wicks:

These are an eco-friendly alternative that’s becoming popular in natural candles. Hemp wicks work well with beeswax and other natural waxes, providing a slow burn and minimal smoke.

Flat Braided Wicks:

Ideal for container candles, these wicks are flat, which helps them curl while burning, keeping the flame centered and steady. These wicks are often used in paraffin and soy wax candles.

Square Braided Wicks:

These wicks are often used in beeswax candles, as they burn slower and provide a consistent flame. They work well in votive or pillar candles.

Candle Wick

Factors to Consider When Choosing a Wick

When selecting a wick for your candle, there are a few key factors to consider that will ensure your candle burns efficiently and cleanly.

1. Type of Wax

The type of wax you are using will significantly impact the wick you choose. Softer waxes like soy require thicker or wider wicks, while harder waxes like beeswax or paraffin may burn well with thinner wicks.

For example, wood candle wicks are ideal for soy candles as they have a steady, slower burn rate, and complement the natural look of the wax. However, if you’re using paraffin wax, a cotton wick may perform better as paraffin burns at a different temperature and consistency.

2. Candle Diameter

The diameter of your candle is crucial in determining the right wick size. The larger the candle’s diameter, the thicker or stronger the wick should be to ensure an even melt pool. If you choose a wick that’s too small for your candle’s diameter, it may lead to tunneling, where only the center of the candle burns, leaving wax on the sides.

For instance, if you’re making a wide candle in a glass container, a wood candle wick may work well because of its broader burn pattern. However, for smaller votive or tea lights, a thinner cotton wick would suffice.

3. Fragrance Load

Highly fragranced candles often require a wick that can handle the extra oils. Candles with a strong scent load need a wick that can produce enough heat to melt the wax evenly and release the fragrance effectively. Wood wicks are particularly good for heavily scented soy candles because they provide an intense heat that melts the wax more uniformly.

4. Burn Time

If you want a longer-lasting candle, the size and material of your wick will play a role in how long the candle burns. Thicker wicks, like square braided or wood wicks, tend to provide a slower, more consistent burn compared to thinner cotton wicks, which can burn faster.

Common Wick Sizing Mistakes

Choosing the right wick is critical for optimal performance, but it’s easy to make mistakes when you’re first starting out.

Wick too large:

If the wick is too large, it can cause excessive flickering, soot, and a very hot flame that leads to the wax melting too quickly. The candle can also “mushroom,” where excess carbon builds up at the tip of the wick, resulting in an uneven burn.

Wick too small:

If the wick is too small, it may result in tunneling, where only the center of the candle burns, leaving wax on the sides. This not only reduces the candle’s life but also wastes wax and fragrance.

Improper wick trimming:

Failing to trim your wick before lighting the candle can lead to a larger, uncontrolled flame, increasing the risk of soot and an uneven burn. Keeping the wick trimmed to about 1/4 inch helps the candle burn smoothly.

How to Test Your Wick

To ensure you’ve chosen the right wick, it’s a good idea to conduct a burn test. Here’s how you can do it:

Set up a test candle:

Make a small test candle in the container or mold you intend to use.

Burn time:

Light the candle and let it burn for about two to three hours to see how the wick performs. During this time, observe how the wax melts and whether the flame is steady.

Adjust if necessary:

If the candle tunnels or produces soot, you may need to try a different wick size or type. Keep experimenting until you achieve a consistent burn.

Candle Wick

Choosing Wood Candle Wicks

Wood candle wicks have become increasingly popular, especially in luxury or natural candles. Not only do they provide an aesthetically pleasing look and crackling sound, but they are also sustainable. Wood wicks work exceptionally well with soy wax due to their wider burn pool, which helps release fragrance more evenly.

When using wood candle wicks, make sure to choose the correct width for your container. A wick that’s too narrow won’t burn the entire surface area of the candle, while one that’s too wide may create an overly large flame. Always perform a burn test with wood wicks to ensure they burn as desired.

Tips for Saving Money on Wicks

Candle making can be expensive, especially if you’re testing multiple wick sizes and types. Here are a few tips to save money when buying wicks:

Buy in Bulk:

Purchasing wicks in bulk is often more cost-effective, especially if you’re making candles frequently. Consider buying a variety pack of wicks to experiment with different sizes.

Repurpose Old Candles:

If you have an old candle that didn’t burn correctly, you can repurpose the wax and try again with a new wick.

Test with Small Batches:

When testing different wicks, make small test candles instead of larger ones. This saves both wax and fragrance oil during the trial-and-error phase.

Conclusion

Selecting the right candle wick is essential for crafting high-quality candles that burn evenly and last longer. Factors such as the type of wax, candle size, and fragrance load all play an important role in determining which wick will work best. Wood candle wicks, in particular, provide a unique aesthetic and performance benefit, especially for natural candles like those made from soy wax.

By carefully selecting the right wick, performing burn tests, and considering your specific candle-making needs, you can avoid common mistakes and create candles that not only look beautiful but also burn perfectly.